Table of Contents
- Main page
- For All Users
- For Designers
- For Developers
- Developers FAQ
- Running SVN version
- Dev notebook
- Module Tutorial
- Creating Modules
- Smarty Tips
- For Editors of this wiki
This page in: English - Deutsch - Español - Français - Italiano - Lietuvių - Nederlands - Norsk - Polski - Русский - Svenska - Tiếng Việt - عربي - 日本語 简体中文
Creating Modules
Use Skeleton to start your module
Skeleton is a pedantic module. It doesn't really do anything, other than provide a nice, commented starting point for creating your own modules.
Using ModuleMaker to start your module
- 1. Download the ModuleMaker module
- 2. Install it just like any other module
- 3. Go to ModuleMaker in the Extensions menu and follow the wizard.
- 4. For Unix/Linux, change module ownership.
- 5. Add necessary functionality to your heart's content.
ModuleMaker is limited to CMSMS Version 1.0 (November 24, 2006)
Using Catalogue-like module maker
If you wish to create a content module which lists items, you can try CTLModuleMaker. It will create a fully functional module - you don't even need php knowledge. But it can also be a good way to see some module-making possibilities...
- 1. Download and install the CTLModuleMaker module
- 2. Go to CTLModuleMaker in the Extensions menu.
- 3. Clicking on "Create a new module" will start the wizard. For each step, the help tab will show specific instructions and explanations.
The basic idea is that you create different levels of organization, define the fields and properties for each level, and at the end a new custom module will be created. If the module help does not cover all you wish to know, see the included FAQ.
Extending the CMSModule class
A CMS Made Simple module extends the CMSModule class. When a constructor is added to a module class, this has to call the parent constructor explicitly, because PHP will not do this automatically. Errors can occur if this is not done, because important aspects of CMSmodule will not get loaded. For example:
class MyModule extends CMSModule {
  function MyModule() {
    parent::CMSModule(); // Call the parent constructor
    ...your own constructor code...
  }
}
See http://www.php.net/language.oop.constructor
General Tips for Module Developers
User_Handbook/Developers_Guide/Creating_Modules/General_Tips
Example code: From Hello World, to a simple visitor logging module
Here's code from a CMSMS presentation showing how to make a simple module: Example code: From Hello World, to a simple visitor logging module Note: Feel free to paste the code onto a separate wiki page if you would like.
Use inline links for frontend links and forms!
Making the link inline will make it replace the current block instead of always the {content} block. This is a much better behavior. (I, Elijah Lofgren, am planning to make all frontend links in the Album module into inline links).
Use {debug} when debugging smarty templates!!! Very useful!!
See: http://www.smarty.net/docs/en/language.function.debug.tpl
Column types available for tables in adodb lite
Look on this page under "Cross-Database Type Codes" http://adodblite.sourceforge.net/datadictionary.php
Access current page id or alias
$gCms->variables['page_name'] (for page alias)
$gCms->variables['content_id'] (for the id)
Get the URL of a given page id
   $hm =& $gCms->GetHierarchyManager();
    $curnode =& $hm->getNodeById($pageid);
    $curcontent =& $curnode->GetContent();
    echo $curcontent->GetURL();
Output debug information that will only show when $config['debug'] = true
Example:
debug_buffer('Updating order because parent id changed ' . __LINE__);
Output status messages like those shown after a page is edited
You just need to add another parameter to the Redirect function. So replace stuff like this:
$this->Redirect($id, 'defaultadmin', $returnid);
with something like this (replace 'templateupdated' with the name of the lang string that you want shown):
$params = array('module_message' => $this->lang('templateupdated'));
$this->Redirect($id, 'defaultadmin', $returnid, $params);
Note: this only works on CMSMS 1.0-svn
Output status messages for a certain tab
In this example we will output a status message after the Comment list (Display) template is edited in the Comments module.
First we open action.updatelisttemplate.php and find a line like this:
$this->Redirect($id, 'defaultadmin');
We replace it with this:
$params = array('tab_message'=> 'list_template_updated', 'active_tab' => 'list_template');
$this->Redirect($id, 'defaultadmin', '', $params);
Now we need to add the lang string 'list_template_updated' so we open lang/en_US.php and add this line:
$lang['list_template_updated'] = 'The Comments Display template was successfully updated.';
Next, we open action.defaultadmin.php and find a line that looks like this:
echo $this->StartTabHeaders();
We need to make the $tab var hold the name of the tab that needs to have focus so we add lines so it looks like this:
echo $this->StartTabHeaders();
if (FALSE == empty($params['active_tab']))
{
    $tab = $params['active_tab'];
} else {
    $tab = '';
}
Now we find a line like this:
echo $this->SetTabHeader('list_template', $this->Lang('list_template'));
We change it to something like this:
echo $this->SetTabHeader('list_template', $this->Lang('list_template'), ('list_template' == $tab));
This basically says if $params['active_tab'] == 'list_template' then make this tab active.
Now we scroll down and find this line:
echo $this->StartTab('list_template');
To get the status message shown we need to pass the $params parameter. So change it to this:
echo $this->StartTab('list_template', $params);
Now, whenever someone clicks the "Submit" button in the Comment Display Template tab, they will be returned to that tab and shown a success message.
Example: 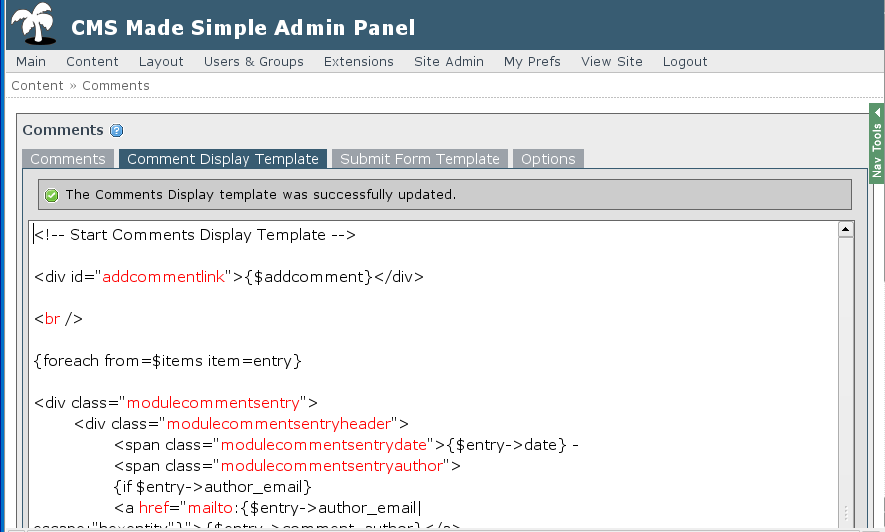
Note: this only works on CMSMS 1.0-svn
Output error messages with Troubleshooting links to wiki
Use code like this:
echo $this->ShowErrors($this->Lang('error_nofilesuploaded'));
Note: this only works on CMSMS 1.0-svn
Enable translations from the Translation Center
Extended version could be found on forum: Translation tool for modules and the core!.
If you are a module developer, and if you internationalized your module (= you have a lang folder with your language in it), then your module is listed in the Translation Center.
Please do not commit any language file other than the one for your module’s natural language (actually the natural language of the module as listed in the Forge categorization). For example, TagRep’s natural language is English (even though the author speaks German). Then only en_US.php should be in the module repository now.
Your natural lang file (like en_US.php) should still be directly in the /lang folder. From there you'll grab all translations files, those will reside now in /lang/ext/ folder (all of them, no more separate folders for each language).
For the modules to work, we need a small modification which in a few days will be in the 0.11.3 version. If you after that want to make a release that is compatible with 0.11.2 and older versions you will need to move the lang files yourself when creating that release.
You will have to add a command to have your module SVN project to grab all the languages when you do an svn update, in order to get them all for your release. Bear in mind that there are people working with the svn version of your module, and some do not download the module release files.
Setting up the ext directory
If you have developed your module without using Translation Center and you have put some translated files in lang/ext directory remember to remove the lang/ext from SVN before applying changes written below.
The command to put in your module SVN is (replace ModuleName by your module name of course):
for Unix users, command:
svn propedit svn:externals modules/ModuleName/lang
In that file, set:
ext http://svn.cmsmadesimple.org/svn/translatecenter/modules/ModuleName/lang/ext
for Windows users using TortoiseSVN:
Go to your working copy of your module. Here, right-click and go to Properties. You will find a Tab called Subversion (with the tortoise icon). There, you can set properties. Select the svn:externals property from the drop-down menu and write in the edit box:
lang/ext http://svn.cmsmadesimple.org/svn/translatecenter/modules/ModuleName/lang/ext
then click Set and do not forget to re-commit the whole module, or at least the lang folder.
Adding to Translation Center is not automatic. So we ask you to inform us if you add internationalization feature, in order for us to add your module to the translation tool at this moment.
Now run the following commands
svn cleanup lang
svn update
svn commit lang
svn update lang
You only need to do this once and please do this as soon as possible!!
If you are a module developer but also did a translation, please join the given language project. This will handle the permissions for you to enter translations in the Translation Center.
If your language doesn't exist in the Forge, create a project and inform us (contact at end of this message), then we will add it to the Translation Center config.
And finally, if you are a developer of a module without internationalization (language is hard coded) then your module is not in the translation tool. So we ask you to inform us if you add internationalization feature, in order for us to add your module to the translation tool at this moment.
If you want to see which files are currently translated for your module you can always go to:
http://svn.cmsmadesimple.org/svn/translatecenter/modules/ModuleName/lang/ext
Make your module use clean URLs
Update: Inline links should be used instead of the ones used in this guide. by Elijah Lofgren
In this example we will be making the Album module use pretty URLs.
Album currently use URLs like this one for pictures: index.php?mact=Album,cntnt01,default,0&cntnt01albumid=1&cntnt01pictureid=2&cntnt01returnid=55
and URLs like this one for accessing albums: index.php?mact=Album,cntnt01,default,0&cntnt01albumid=1&cntnt01returnid=54
You can see we have the following parameters "albumid", "pictureid", and "returnid". We need to register those parameters with CMSMS so that we can use clean URLs.
The place you register your parameters is in the SetParameters function of your module.
For example, in the Album.module.php file we need to change the SetParameters() function from this:
function SetParameters()
{
	$this->CreateParameter('albums', '', $this->lang('help_albums'));
}
to this:
function SetParameters()

{

	$this->CreateParameter('albums', '', $this->lang('help_albums'));
	// For viewing a picture
	$this->RegisterRoute('/album\/(?P<albumid>[0-9]+)\/(?P<pictureid>[0-9]+)\/(?P<returnid>[0-9]+)$/',
array('action'=>'default'));
	// For viewing an album
	$this->RegisterRoute('/album\/(?P<albumid>[0-9]+)\/(?P<returnid>[0-9]+)$/',
 array('action'=>'default'));
	// For viewing a thumbnail page
	$this->RegisterRoute('/album\/(?P<albumid>[0-9]+)\/page(?P<page>[0-9]+)\/(?P<returnid>[0-9]+)$/',
 array('action'=>'default'));
}
A little info about the above regex:
(20:32:13) elijahlofgren: I know some regex but what does "?P" stand for?
(20:32:48) Ted: You know the matches result? That basically gives a name to the result instead of looking for the index of it
(20:33:20) Ted: So, when I get my matches, I can just pass that along as the parameters that would've been on the
 big long string
(20:33:39) elijahlofgren: Ted: ah, ok. (Thinks he undestands).
(20:34:36) Ted: So, I'll have $matches['albumid'] instead of $matches[1] in my result for that [0-9]+
Here's info about the RegisterRoute function.
/**
 * Register a route to use for pretty url parsing
 *
 * @param string Route to register
 * @param array Defaults for parameters that might not be included in the url
 */
function RegisterRoute($routeregex, $defaults = array())
Next we need to actually use clean URLs in the links that Album outputs.
URLs are outputted using the CreateLink function.
The prototype is:
CreateLink($id, $action, $returnid='', $contents='', $params=array(), $warn_message='', $onlyhref=false,
$inline=false, $addttext='', $targetcontentonly=false, $prettyurl='')
For example here is the function in album that outputs a URL to view an album.
$albums[$i]->link = $this->CreateLink($id, 'default', $returnid, '',
array('albumid'=>$albums[$i]->id), '', true);
We need to add the $prettyurl parameter so it looks like this:
$albums[$i]->link = $this->CreateLink($id, 'default', $returnid, '',
array('albumid'=>$albums[$i]->id), '', true, false, '', false, 'album/'.$albums[$i]->id.'/'.$returnid);
Now the URL for viewing an Album is: /album/1/54/ instead of: /index.php?mact=Album,cntnt01,default,0&cntnt01albumid=1&cntnt01returnid=54
Much nicer. :)
We also need to add the pretty URL parameter to the rest of the calls to CreateLink.
So we find:
$allpictures[$i]->link = $this->CreateLink($id, 'default', $returnid, '',
array('albumid'=>$albumid,'pictureid'=>$allpictures[$i]->id), '', true);
and change it to:
$allpictures[$i]->link = $this->CreateLink($id, 'default', $returnid, '',
array('albumid'=>$albumid,'pictureid'=>$allpictures[$i]->id), '', true, '', '', '',
'album/'.$albumid.'/'.$allpictures[$i]->id.'/'.$returnid);
Now the URL for viewing a picture is like: /album/1/2/54/ instead of: /index.php?mact=Album,cntnt01,default,0&cntnt01albumid=1&cntnt01pictureid=2&cntnt01returnid=54
There is one last URL we need to change, the one for viewing a thumbnail page:
So we find:
$link['page'][$i] = $this->CreateLink($id, 'default', $returnid, '', array('albumid'=>$albumid,'page'=>$i), '', true);
And change it to:
$link['page'][$i] = $this->CreateLink($id, 'default', $returnid, '', array('albumid'=>$albumid,'page'=>$i), '', true,
'', '', '', 'album/'.$albumid.'/page'.$i.'/'.$returnid);
Now the URL for viewing a thumbnail page will be:
/album/1/page2/54/
instead of:
/index.php?mact=Album,cntnt01,default,0&cntnt01albumid=1&cntnt01page=2&cntnt01returnid=54
There, using this example hopefully you can figure out how to make your module use pretty URLs.
If you have questions or problems, post in the Modules/Add-Ons forum.
How to prepare settings for an upgrade of your module
When you have prepared a new version of your module and you want, for example, to extend one of the tables (and not loosing the earlier entered data), you are in need of the upgrade functionality. If you have followed the Skeleton module, you have found the mymodule.upgrade.php file. This file allows to make the alteration. First of all you must have installed your module (named here mymodule). Steps involved:
- 1 - update your mymodule.module.php and change the version number in the function GetVersion();
- 2 - update your mymodule.upgrade.php with the wanted extension to tables, updates on data in tables, newly tables. Set the version number to the same number as in step 1;
Example:
switch($current_version)
{	case "0.1.0":
		... your coding here ...
  		$current_version = "0.1.1";
	case "0.1.1":
	     break;
}
- 3 - update the file mymodule.install.php with the newest table settings (for users that will install your module from scratch);
- 4 - update the file mymodule.uninstall.php to delete any newly tables/settings being defined in this upgrade. Also ofcourse to tidy up the database correctly.
- 5 - change the version log in the language file (normally the file en_US.php);
- 6 - FTP mymodule.module.php, mymodule.install.php, mymodule.uninstall.php and en_US.php. With alterations or new tables, you most certainly have updated other files as well. FTP them as well.
Since during the installation the current version is written to one of the CMSMS tables, this version will be held against the version as mentioned in the mymodule.module.php. If they differ, you will be notified in the Admin Console (Extensions/Modules see mymodule row) that the status states "Needs Upgrade". Perform the upgrade. Once the upgrade has been done, the newest version will be shown on the Admin Console and regular status is shown ("Installed").
Insert database driven templates
Templates are used to show data in a formated way. However they might be only available as a .tpl file in the templates directory that you prepare. For more user friendly usage of a template you might want to have it in a database. This paragraph describes how you can achieve this.
Start of by installing the skeleton module.
Once installed, select it using Extensions\Pedantic Skeleton Module, the following will show up:
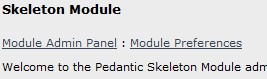
Select the Module Preferences:
Not much, but that is what the skeleton module is precisely for.
The idea is to expand the preferences page with a database related template. So the end result of this step-by-step case is that it will be possible to update a template that is derived from one of the CMS Made Simple tables. What is the use, you might be asking? Well to be honest, nothing. It is only to learn how to prepare a new template related field in the back office. The gained knowledge can then be used during the building of one of your own modules or expanding existing ones.
OK, lets go.
Step 1: Insert new field in the preferences screen to contain the template information. Open up your favorite editor and open from directory Skeleton\templates the file adminprefs.tpl. Locate the following code snipped:
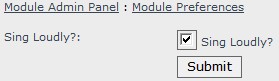
<div class="pageoverflow">
	<p class="pagetext">{$title_sing_loudly}:</p>
	<p class="pageinput">{$input_sing_loudly}</p>
</div>
This is the field that contains the checkmark for sing loudly. Copy and past it just below the part as shown above. For this case I have prepared the following:
<div class="pageoverflow">
        <p class="pagetext">{$title_sing_template}:</p>
	<p class="pageinput">{$input_sing_template}</p>
</div>
Basically the only thing that I did was change “loudly” into “template”. Make sure that the dollar sign is included, since that means a variable can be past. Also make sure that the two lines don’t contain the same variable. Save the template and close it.
Step 2: Show the template field
Open from directory Skeleton the file action.admin_prefs.php. Locate the following line:
$this->smarty->assign('title_sing_loudly', $this->Lang('title_sing_loudly'));
This is the last line that is field title (label) related. We just added, in the tpl file, the template field below this title of sing loudly. Now add the title for the template field. All the smarty around it, is to make it language independent. I just add some remarks as well for better readability:
// Prepare the lable for the sing_template field
$this->smarty->assign('title_sing_template',$this->Lang('title_sing_template'));
Make sure that ‘title_sing_template’ is used and that this is exactly the same (without the dollar sign) as what has been entered in the tpl file on the line with class “pagetext”.
Now that the title is in place, the field that will contain the template information needs to be put in. Locate the statement containing ‘$this->smarty->assign('input_sing_loudly',…’. Just below this statement add the following:
// Present the field containing the template
$this->smarty->assign('input_sing_template', $this->CreateTextArea(false, $id,
$this->GetTemplate('sing_template', 'Skeleton'),'input_sing_template'));
Mmm, quite some variables in this statement. I take it that you understand the first one in the assign function. The first “input_sing_template” to name the parameter. The second, in the GetTemplate’ part, is related to the input field in the tpl file (the contents). Next a text area is prepared with a width of 80 characters and 25 lines (try to vary it after you have completed this step-by-step case). The GetTemplate is used to retrieve the template ‘sing_template’ for module ‘Skeleton’. Of course it doesn’t exist yet, but we will come to that later on. Save the file. Can’t wait to see the result? Open the admin preferences part of the Skeleton module and you will see the following:
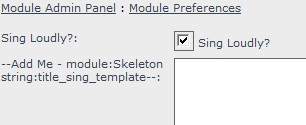
The white field is bigger then shown here, you will see it with scroll bar and the submit button just below it.
Step 3: Prepare a title ‘translation’:
Translation? Well yes and no. A language variable is added that will be used to translate the string ‘title_sing_template’ into something more user friendly. Open file en_US.php in the Skeleton\lang directory. Locate the following line:
$lang['title_sing_loudly'] = 'Sing Loudly?';
Copy and paste it. Change the copied line into:
$lang['title_sing_template'] = 'Sing Template';
Save and close the file. Go back to the Module Preferences screen and press F5 to refresh it. Nice work. This is more readable. It didn’t work? Maybe the translation file is not yet save? Or maybe a typo got in the way.
Step 4: Save the contents of the template field
Open file action.save_admin_prefs.php from the Skeleton directory. Locate the line:
$this->SendEvent('OnSkeletonPreferenceChange',$parms);
Just below this line add the following:
if( isset( $params['input_sing_template'] ) )
{
  $this->SetTemplate('sing_template',$params['input_sing_template']);
}
Because you are in the Skeleton module, the class SetTemplate doesn’t have to know the module that you want to save it under. Save the file and test using F5 on the Module Preferences page.
Still hungry for more information on the parameters of the classes? Then check out the API Documentation
Register your module as a plugin
If you want to activate the ability to have {mymodule} available instead of {cms_modules module="mymodule"} you can register your module as a plugin using the following code in your class:
	function SetParameters()
	{
	   $this->RegisterModulePlugin();
	}
General Tips for CMSMS Module Developers
- elijahlofgren: I think that's what I used for the show subpage content which you showed me :)
- calguy1000: yep.... well when coding a module it also has a {module_action_link} plugin
- calguy1000: like: {module_action_link module='Availability' action='admin_delete_rsrc' image='icons/system/delete.gif' imageonly=1 rsrcid=$onersrc.id text=$mod->Lang('delete') confmessage=$mod->Lang('ask_delete_resource')}
- calguy1000: because CGSimpleSmarty derives from CGExtensions, it'll automatically search image directories for the right file (including the current theme)... so I just have to specify a relative pat
- Security
- Put this at the top of *every* method.* or action.* PHP file in your module:
if (!isset($gCms)) exit;
- Also have something like this at the top of every file and in every admin action (method/function) of your module:
if (!$this->CheckPermission('Use Album')) exit;
- Uploading Files
- Make sure you use cms_move_uploaded_file (it handles the permission issue consistently with the other modules and the core)
- Releases
- Update MinimumCMSVersion to the latest CMSMS production version so that you don't have to test with older CMSMS versions (not fun)
- How to tag a new module release (example using dojoeditor)
 svn copy http://svn.cmsmadesimple.org/svn/dojoeditor/trunk
 http://svn.cmsmadesimple.org/svn/dojoeditor/tags/0.1-release -m "Tagging 0.1 release."
- Useful Links
- CreateLink & DoAction methods in module api - $id and $returnid parameters explanation
- PHP coding guidelines - Keep in mind that these are just guidelines, they are not required but if you're wondering how you should format your code they will come in useful.
This page in:
English -
Deutsch -
Español -
Français -
Italiano -
Lietuvių -
Nederlands -
Norsk -
Polski -
Česky -
Русский -
Svenska -
Tiếng Việt -
عربي -
日本語
简体中文
